Another Fine Mess[]
Find a Way Out[]
Lara finds herself hanging in a strange place. Swing back and forth until Lara puts her legs on the beam above. Tap the Action button to break free
and fall to the floor. Something can be heard banging, so move as fast as you can towards a small tunnel to the right.
Lara crouches and starts to move through. The door in the other room opens, and Lara flattens herself against the wall as a huge creature dragging a club moves past. Do not go back into the room, or Lara will be killed in an instant.
Continue down the path of carnage until she slides down a slope and lands on a heap of bones. Some shotgun shells sit in the sand just ahead. Go over and pick them up. Continue up the path and Lara takes a shotgun from a corpse.
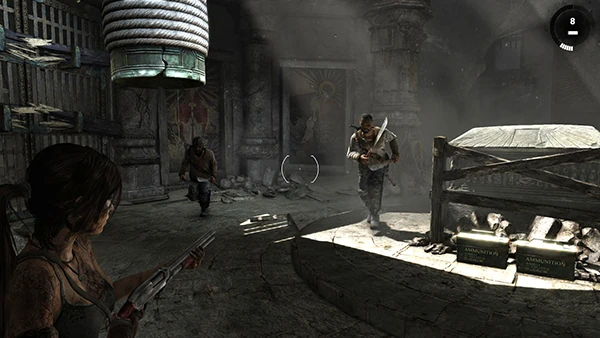
Lara aims it at the boards and barbed wire ahead. Press the Fire button to clear the path and attract attention from the nearby Solarii. Continue along the path and climb through a window.
Solarii drop in on Lara as she studies the room. Take them out with your new shotgun or save the ammo and use other techniques. When the area is clear, use a rope arrow on the bell, sending it crashing into a gate.
Follow the new path to find a camp. Rest and purchase any items you want. Fire the Shotgun at the door to get back outside.
Balance along the narrow ledge and climb up some boards that hang from the side of a platform. Run around the platform and crawl through the window. You are attacked by more Solarii. Take out the ranged man first and then proceed to Counter the others.
Run up the ramp when they are dead and take out another Solarii who drops down. To get out of the area, you have to drop the big bell onto a weak section of floor.
Crank open one set of shutters and fire a rope arrow on the ball to get it to swing into a broken support beam. Close the shutters and repeat the process on the other side. (Visual)
At this point, more Solarii attack with bows and melee weapons. Take them down and open both sets of shutters. Use a rope arrow on the metal ball so it swings into the bell, which makes the bell drop to the floor.
Lara is also sent down to a lower level of the room where an Oni enters. Run in the opposite direction and jump over the gaps as you go. After the room rotates onto its side, leap over to a bridge, but it snaps and sends Lara sliding down a tunnel. When she pulls out the shotgun, use it on two sets of boards to clear the way. Lara splashes back into the Mountain Village.
| ←Mountain Pass Walkthrough (First Visit) | Chasm Monastery Walkthrough | Mountain Village Walkthrough (Third Visit)→ |
Tomb Raider (2013) Walkthroughs
| |
|---|---|
|
Scavenger's Den · Coastal Bluffs · Coastal Forest · Mountain Temple · Mountain Village (First Visit) · Base Approach · Mountain Base · Base Exterior · Cliffside Village · Mountain Village (Second Visit) · Mountain Pass (First Visit) · Chasm Monastery · Mountain Village (Third Visit) · Mountain Descent · Shantytown · Cavern Entrance · Geothermal Caverns · Solarii Fortress · Fortress Tower · Summit Forest · Gondola Transport · Shipwreck Beach (First Visit) · Cliffside Bunker · Shipwreck Beach (Second Visit) · Research Base · Mountain Pass (Second Visit) · Chasm Stronghold · Chasm Shrine · Chasm Ziggurat | |